Author: keh101

Blog #5 DIY: Lightening Your Photos

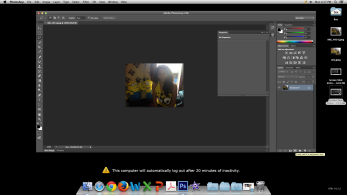
Have you ever taken an almost *PERFECT* photograph? I mean, your outfit was stellar; your setting was more than ideal. The only downside was that the lighting in the photo was just a tad too dark? Well, this recently happened to me. I decided to check out CMU’s annual carnival with a friend. I happened to be wearing my Despicable Me Minion shirt that day. (I’m obsessed with the movies.) So we’re meandering around, seeing what there is to see, when we stumble upon a Despicable Me Fun House. It. Was. Epic. I took several great photos, but my favorite one came out a little too dark for my liking. See for yourself (below).

Image


Now follow along as you see how I made my picture “picture perfect”! (Pun intended!)

Step 1: Upload your photo in Photoshop. Then click on the fill tool on the bottom write of the screen.

Image


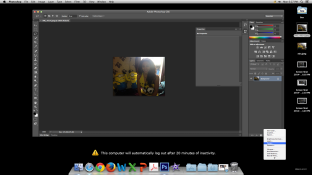
Step 2: Select Curves.

Image


Step 3: Select the Lasso tool and outline the sections of the photo that you would like to either lighten or darken. 

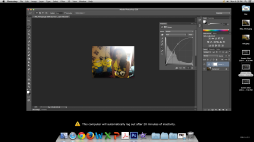
Step 4: Use curves to either increase or decrease to the level of darkness that like. Like so. 

Image

Step 5: Do this as many times as necessary. If you want to create different levels (which you would do to lighten one aspect of the photo while darkening another).

Step 6: Enjoy your newer, brighter photo!


BACK TO THE FUTURE

Image

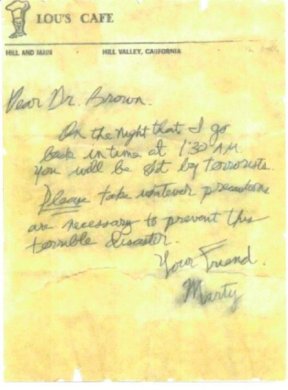
Not entirely sure why, when reading the blog prompt this film series immediately popped into my mind. Alas, it did. And so, as Marty wrote to Doc advising him to take precautions to ensure a better (and longer) future, I will write a letter to my past (current) self. 

Image

Dear FutureMe,

As you continue forward on your journey through life here are some things to keep in mind and utilize; things learned from your Digital Media course with Professor T-Pain. Refer to the list below. Each observation made about the course is accompanied by a lesson learned.

  • Knowing basic skills on how to operate DreamWeaver, Photoshop, CSS, HTML, Audacity and other specialized programs and design systems is at present, the norm. Every kid knows these programs like the back of their hand by age seven. During the time that you were first learning to use these tools, the economy was finally becoming more stabilized. In the process, being affluent in these tools became increasingly appealing and sought after by employers. (Hopefully, by the time you read this, you have mastered all of these programs.) Lesson: Continue to explore and research different mediums and/or modes of communication. The broader your knowledge base and experience, the better you’ll be able to contribute to the world and the better you’ll be able to communicate and collaborate with others. 
  • Speaking of others, archiving (an idea thoroughly presented to you for the first time in this class) is a constantly re-occurring process that can (and to an extent does) include the average citizen, also known as a citizen archivist. Understand that there exists different levels of citizen archiving. On a very basic level archiving is completed each time a person takes a photo of themselves or of friends, blogs or . Beyond that many people choose to make their careers out of archiving, spending years garnering an an extensive and expensive education to become doctors of archiving. Lesson: In the grand scheme of the universe, know your role and significance. Always document justly and to the best of your ability, accurately. Understand that as a citizen, many of your everyday activities constitute as archiving, so do so wisely and with a sincere purpose of educating or out of responsibility.
  • Everything is a Remix. There is, very rarely, anything new created in the world. Creativity stems from someone’s unique perspective, which leads to a unique transformation, all of which began with an original. As an aspiring performing artist (you have successfully immersed yourself in the industry), but this is so important for you to realize NOW and implement into your work. Otherwise you’ll spend the next two years struggling to come out with something completely original so as not to sound like anyone else in the industry, when what you need to do is find your inspiration from PAST artists and remix things in your own way. This will save you time and energy.

As a whole, what you learned from this class is this: hard work, determination and creation really pays off. I don’t think you realized the significance or coolness of you designing and then *creating* your own communication platforms (website, audio project, video projects), until after you graduated. But, there is honestly nothing quite like having a vision and then bringing it to life; especially when it comes to digital media. Simply because… once it’s done you can throw it out into the digital world to be shared, admired, critiqued. 

You grew to see the world in a different light, remixed if you will, in the ways that DJ Spooky described in his book. You also learned to more effectively critique other individual’s remixes, knowing the types of things to look for (rule of thirds in photos, camera shots and angles with video, use of music to set the tone or mood for a radio show). You were exposed to things you would have otherwise never known. Take this blessing NOW, reflect on it NOW, and run with it. Continue listening and watching the shows and individuals you were introduced to; they are now your new mentors. Let the learning process continue even post-graduation, and continue soaking EVERYTHING up like a sponge.

It will continue to do you wonders.


XO,


you


DIY: Premiere Cut, The “Vintage” Look

Nowadays, every technological device provides users with an easy way to alter the appearance of a photo or video footage through the use of filters. The same has become the case with the many different softwares and applications we load onto these mediums. Adobe Suite’s Premiere Cut is no different. In this DIY overview I will share how to successfully alter one’s Premiere Cut project to make the footage appear “vintage”. (Personally, I am a huge fan of filters! I immediately recognized that this would be beneficial in about 80% of all projects I’d ever do.) I hope the same can be said for you! Even if this is not the case, there is no doubt in my mind that this is a trick you will enjoy 🙂


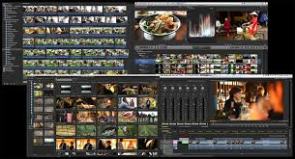
First, create your basic video sequence. (Whatever your incredibly interesting subject may be!)

Image

Keep in mind that yours, especially if you’re a beginner, won’t look as jumbled as the one pictured above. On this next step keep in mind that you DO have the ability to add video effects to each individually, or you can make a duplicate of the ONE you choose to edit. The choice is yours.

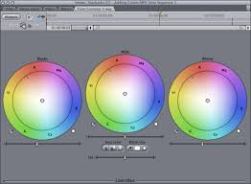
Second, open the Color Correction folder under Video Effects.

Image


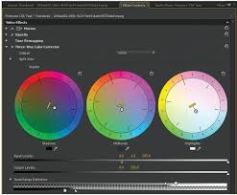
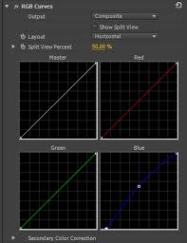
Third, drag the following types of effects into your sequence: color balance, RGB curves, brightness and contrast. These are the factors that will assist you with successfully creating your vintage look.


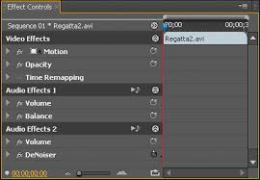
Fourth, under the Effects Controls open out the RGB Curves options and begin editing the curves profiles.

Image


Fifth, tone down vibrancy of colour adjustments with the Saturation option of the Color Balance (HLS) effect.

Image

 Sixth, to ensure that there’s a balance, bump the brightness and contrast to around +15% and +25%.

Seventh,  add an Invert effect from under the Channel Video Effects and then change the Blend Mode to Screen under the Opacity settings.Image


Play around with all of these and you’ll get something great!

Blog Post #10: Amar

While most American kids only have to concern themselves with what activity they want to dedicate their evenings to, Amar, (who we assume is from India), is a kid who has been forced to grow up at a very young age. His days do not go by with carefree feelings of enjoying a day at school, only to be picked off by mom or dad and taken to soccer or baseball practice. No. Instead, he begins his day by waking up at about 3:00am. He moves about the tiny one-two room living space so as not to wake his younger siblings and parents, all of whom share a bed. His efforts are in vain seeing that everyone watches him prepare to leave to start his newspaper delivery route, whispering “goodbye” as he steps through the feeble doorway. Amar doesn’t have his parents to drive him from point A to B. He instead relies on his sturdy bicycle to get him all over the city. In between stops, or after completing his round (6:00am), he spends a little bit of time reading the content on the day’s paper, in its entirety. He then heads to work for a few hours. After, he returns home to freshen up before going immediately to school. After school is more work, followed by a late night of studying. We assume, from the video’s conclusion, that the pattern just repeats itself.


Strategies

The immediately noticeable and rather interesting strategy that caught my attention was the lack of words or voices in this documentary. Rather than using an individual to narrate the story, the creator(s) chose to only include sounds from the surrounding environment(s) to serve as the soundtrack. This allowed me to really focus on what Amar was doing, and to really grasp the intensity of this eleven or twelve year old kid’s life. He was enduring (without complaint) things that I know the average adult couldn’t even begin to handle. This choice of (shall we say), “isolation”in terms of voices, created a strong impact and was cool because it was something I immediately recognized, though it was in no way off-putting or distracting from the overall story. The only time when this pattern was sidestepped was when Amar was in school- where the class was learning English and the teacher continually correcting him as he read aloud. This was intentional. His learning the English language was the one factor that connected him to the States.

Use of time/ captions

I LOVED how the creators chose to incorporate time captions as the theme (into the title), and use it to mark scene changes and cuts as Amar moved about throughout the day. They helped with marking the story and keeping things in order and flowing. It helped the viewer to more easily follow along and keep pace with everything that was going on. In addition, I think this immensely helped with putting the challenges and amazing work ethic of Amar (who never once complained) into perspective.

In regards to my own project, this one showed me that silence can in fact be golden. A lot of talking and narration is not always necessary to create an impact. However, if it is properly placed it can make all the difference. I also saw that the use of captions can really enhance a story or assist with the flow of my story. Key points: captions need to be relevant and have key placement.

Blog #9: DIY Audacity

Although this may seem rather simplistic compared to posts created by my peers, I chose to give a brief introduction on how to use Audacity. This DIY tutorial would be very helpful to any and all individuals who may have missed the lecture where the instructor explains how to use the software because they were sick. (This was the case for me!) So let’s get started.

STEP #1

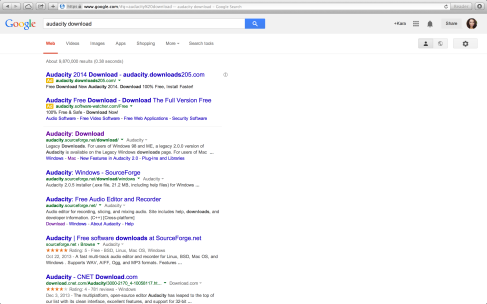
Begin by downloading the software (for free).

Image

Select the Audacity software that is compatible with your computer, and proceed to download.

STEP #2

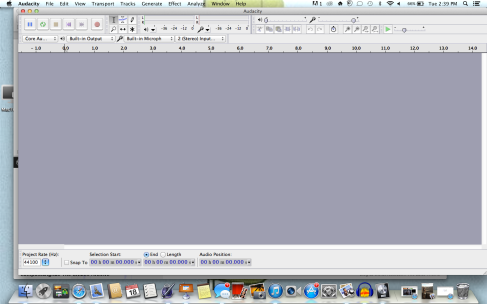
Once you have finished downloading, open the application. You should find yourself looking at a screen like the one below.

Image

If your first experience with Audacity is anything like mine, you are utterly confused! But, don’t fret!

STEP #3

It’s not time to select your method of recording. Although you can utilize the built-in microphone on your computer, it’s better to use a separate microphone to ensure that you get the best possible sound quality. (I am actually a singer, so I chose to use the studio microphone that I have in my dorm room for recording purposes.) Once your method of recording is decided upon (microphone or built-in microphone), you should find a quiet area where you won’t be disturbed. (You want to be sure that no outside or unwanted noises are picked up.)

STEP #4

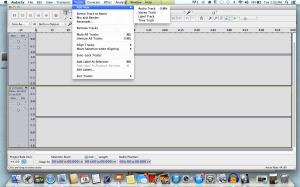
To begin recording you can either click the red button on the upper, lefthand side of the screen OR you can go to top menu and click on “Tracks”. The drop down menu will present an option for “Add New”. Click this, and then proceed to push the red button to begin recording.

Screenshot


STEP #5

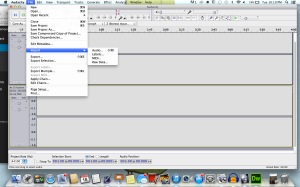
If you need to load music onto your project, all you have to do is go once more to the top menu and select “File” >> Drop down and select “Import”, then go to “Audio”. You’ll need to have your music selection already saved and easily accessible on your computer to make this as efficient as possible.

Screen Shot 2014-03-18 at 10.19.23 PM


STEP #6

To stop recording, press the yellow button.

STEP #7

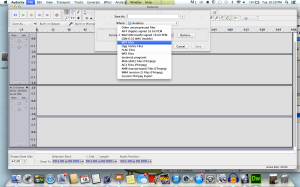
After you have completed compilation of your project, and applying all of your special effects and tricks (refer to other tutorials), save and export as an MP3.

Screen Shot 2014-03-18 at 10.29.03 PM


STEP SHOW #8

Get ready to share!


Blog #8: Lament of Joe Hall

I have opted to analyze the Lament of Joe Hall.

Since the recording began as soon as the page loaded, I didn’t have a chance to read the introduction paragraph in its entirety and grasp what the story was about. Because of this, the first element of the story to capture my attention was the youthfulness of the voice coming through the microphone. It wasn’t what I was initially expecting and was effective in immediately grasping my attention. After all, rarely is a story told from the perspective of child. I was hooked and wanted to hear more.

In terms of format, I loved that the creator began by sharing a background story of Joe’s childhood and upbringing. It gave me strong sense of the terrible hardships he underwent and endured, and caused me to sympathize with him. I developed an emotional attachment to the little guy. This was just one of the rhetorical effects. I felt that creator made the overall story flow by allowing the main character, Joe to express his emotional responses to the events that were taking place around him, sharing his opinion on the matter, in first-person, narrative format. In terms of this, what specifically stood out to me was when he was recounting a night trip with father and Nazi comrades, as they patrolled the Border of Mexico in search of illegal immigrants. Joe explicitly said he was “afraid that [he’d] have to actually shoot someone.” The creator compiles all of these mini-stories and events to build upon the climax of the story, when Joe finally kills his father. The story was concluded well and brought full-circle because the creator chose to not abruptly end the storyline. Instead, he included what happened to Joe following the murder.

One creative element that we discussed in class last week, was the use of music and other soundbites to assist with transitions and enhancing the overall presentation. The creator did an excellent job of this. Not only were musical transitions smooth, but whenever he could insert relevant soundbites he did so. (I.e. following Joe committing the murder of his father, I recall hearing sirens in the background, as well hearing his stepmom, Krista, on the phone calling the police.) All of these things helped to paint a very vivid picture for the listener, and made me feellike I was actually present. I could see everything happening as Joe told it in my mind. 

To further assist the listeners with following along, I loved that the creator also provided a synopsis of the documented event below the audio recording. This helped me to better understand or clarify things that I perhaps missed while listening.  The idea that smooth and relevant transitions (whether music or other soundbites) can make or break a story was reemphasized with this project. The proper utilization of such tools is what helped keep my attention and interest. This was very well done and I hope to execute my project just as well, if not better.

Side note: I loved the title of the piece. The word “Lament” made me think of  a jazz song by the same name that my grandfather introduced me to. Before even listening, I felt that I would be hearing something that provided who or whatever the subject might be with a sense of inner peace. I’m not sure that Joe Hall has yet obtained this, since he is still currently incarcerated, but I pray that one day he does.


Make Em’ Shine!

This is a brief tutorial on how to make your text glow or shine. The idea for researching this initially came to me as I was looking back over my recovery photos, wishing that I had known a way to make my the words on some of my photos *pop* or stand out a little more. After some reading, and test runs, here’s what I discovered:

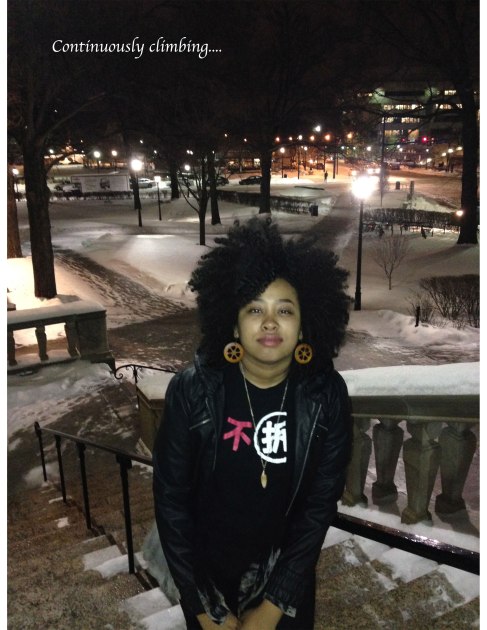
1. Making your text *glow* is actually pretty easy. First, go into photoshop and select (highlight) the words you’d like to enhance. Attached below is the photo that I will use as an example.Image

2. Go to the top menu and select the “Layer”. Once the menu appears, scroll down and select  Layer Style.

3. An additional menu will pop up. Select either Outer Glow or Inner Glow, depending on which one you’d like to enhance. (You can also select “Blending Options”, which provides you with an overview of a variety of adjustments you could make to the font. In you do select “Blending Options”, a new page or menu appear. On the left side of this menu you will be prompted or given the option to select a number of options (Bevel and Emboss, Stroke, Inner Shadow, Satin, Color Overlay, etc). Check or select both Inner Glow and Outer Glow.

5. After selecting Inner or Outer Glow, play around with the different levels of structure (feel free to pick a new color!), elements and quality. 

6. After playing around with the different settings, see what you’ve been able to come up with! 


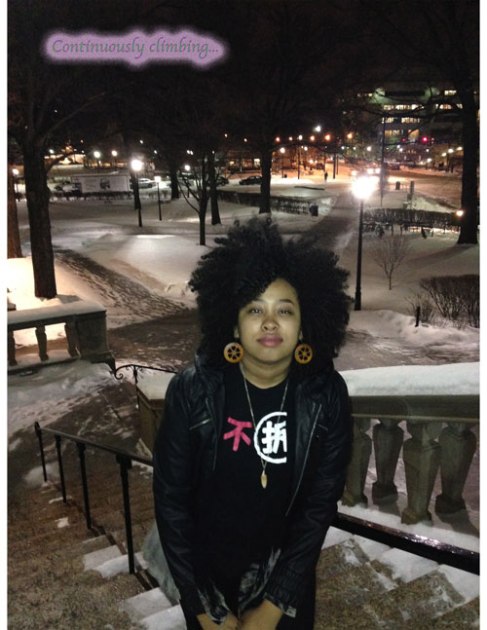
Check out mine below 🙂

Image


Blog #6

The site that I have selected to critically analyze is that of singer/ performer Beyonce (www.beyonce.com). Upon reading the prompt for this post, I immediately knew that it would be most beneficial for me to study the site of a musician since my plan for this semester project is to renovate/ redesign my own music website. And who better to look to than one of the baddest, most talented, hard-working women in the industry? Beyonce is a gamechanger and appears to always be at least one step ahead of the competition. I figured this philosophy would be applicable to her website, and I was right.

The first notable characteristic of the site is that it is entirely black, with the exception of its pink and white font. This is attractive because it gives the site a clean, classic feel. There isn’t too much going on in terms of the theme and color, which ensures that the viewer is not overwhelmed. Because of these specific color choices, the phrase that initially comes to mind is “sophisticated and strong with a dash of femininity”. Beyoncé uses something as ‘simple’ as color to represent and embody all that she has created her overall image and brand as an artist. The font is consistent throughout each page, with the exception of her name. This is in the top center of each page and larger than everything other word on the menu. It almost seems as though it’s there to serve as a reminder to the user of whose page they’re looking at. (As if anyone needs reminding.)

The next feature of the site that caught my attention was the fact that photographs were displayed on the site’shomepage of prominent figures within the African American community. This was clearly in honor of Black History Month. [Pictured first are Edward Bouchet and Anne Lowe.] If one were to then scroll further down the page they would see see an entire collage of historical Black figures with the caption “Black History Month”. She uses images to do a great job of advertising/ marketing for her products, the most recent being her fifth visual album, “Beyoncé”. On the music page, you are immediately thrust into the world of the album. Provided are back to back, are 30 second clips of each of 17 videos created to parallel with the 14 songs featured on the album. One thing that’s very cool is the fact words appear transparently over each photo, which serves as both a label of the photo and a link.

Reintroducing the idea of things transparently “appearing” over the photos, basically EVERY single piece of Beyonés site has a link connected to it. If you click ANY photo it takes you to another part of the website, which then hosts more specific information and/or photos of whatever you clicked on. Also, each time your mouse graces over a photo a particular hashtag pops up. It will say either “#MYLIFE” or “#MYWORK”. Her utilization of hashtags is great, and a perfect tool given the generation and audience(s) that she primarily caters to. Given that the society in which we live, and the fact that fans of musicians nowaday want to be involved in EVERY aspect of their idol’s life, she chooses to share photographs of both her work and personal experiences. Unlike other artists, she does an excellent job of sharing an appropriate amount of her personal life. Enough to keep people entertained and desiring more, but is private enough (I assume) to keep her sanity. Although she doesn’t compromise too much of her privacy, she ensures that everything on the site is highly interactive for users. She has adapted to today’s high tech society where other artists (go look at there pages), have not.

Each photo is well alligned with the other photos that it shares the rest of the page with. Each picture (even those of her personal life), are taken in high resolution, so that they are crystal clear. The majority of them are action shots of her in the moment, whether it be on the beach or in the middle of a concert. Both of these things makes the user want to look through the photos; it draws them in, giving them incentive to see more.

The spacing of the website is wonderful. Although there is not a large portion of whitespace utilized (at least not on the pages where photos are present), she chooses to create a combination of both white/black and color photos. Once again, an ideal balance of color is created so that viewers are not overwhelmed. Regarding precendence, the eye of the viewer is attracted to the top of each page, where the menu is ever-present. This permits the user to easily navigate through the site, constantly in control of what they are viewing at the moment, as well as where they will go next.

Ultimately, what I have taken away from analyzing this album is that, in order to be the best and stand-out, it’s important to ensure that each aspect of the site is designed to cater to the interests of the audience who will be viewing it. Again, given the world in which we live, and how the majority of the population can be connected to everyone else with the click of one button, it’s important to create a site that people feel they can be connected to and experience firsthand. It’s no longer enough to be known just for your skill and music, so she gives what’s necessary. Everything else she does is on her own accord. She’s not afraid to take risk (just look at her business ventures), which is what separates her from everyone else. It doesn’t hurt that she takes the risk, and kicks butt while doing so.